Editorial Note: In the next instalment of our Air War Books series, Ashleigh Brown discusses the ten books that have influenced and shaped her writing as an air power historian.
Our Editor-in-Chief, Dr Ross Mahoney asked me to contribute my top ten air war books – those that have influenced and shaped my own approach to the topic. Catching me in the midst of PhD research, this list clearly shows that my interest primarily centres on the First World War.
Michael Molkentin, Fire in the Sky: The Australian Flying Corps in the First World War (Crows Nest: Allen & Unwin, 2010). Michael Molkentin’s Fire in the Sky was the first military aviation book I ever read. In many ways, this book is responsible for moving my interest from the ground war to the air war, which ultimately led to my PhD research. In the first effort to revise Cutlack’s official history volume on the AFC, Molkentin presents a thoroughly researched and highly readable account of the efforts of Australians in the air during the First World War. Importantly, in doing so, Molkentin places the AFC in its rightful context within wider British air operations. This book, along with his centenary history volume, Australia and the War in the Air, is the authoritative account of the AFC
James Streckfuss, Eyes All Over: Aerial Reconnaissance in the First World War (Oxford: Casemate Publishers, 2016). Before the outbreak of the First World War, the predicted purpose of military aviation was reconnaissance. Accordingly, the focus in the opening years of war was reconnaissance, aerial combat being seen as necessary to ensure that this could be carried out uninhibited. Even with the creation of dedicated fighter squadrons, reconnaissance remained a core task for the air services throughout the war. James Streckfuss captures the importance of reconnaissance and details its progression by explaining early developments in Britain and the American perspective. This book expertly describes the intricacies and difficulties of carrying out aerial reconnaissance.
James Pugh, The Royal Flying Corps, the Western Front and the Control of the Air, 1914-1918 (New York: Routledge, 2017). The advantage found in having control of the air was recognised early in the First World War. The primary purpose of the RFC was to support ground forces through reconnaissance, photography, bombing missions, and artillery assistance; achieving superiority in the air was considered necessary to provide this support. James Pugh’s authoritative work discusses the development and application of air power over the Western Front, demonstrating the approach to obtaining and retaining aerial superiority (or control of the air). In doing so, Pugh rationally and expertly analyses the offensive policy (too often attributed solely to Hugh Trenchard), explaining how it was devised in conjunction with the French air services.
Malcolm Cooper, The Birth of Independent Air Power: British Air Policy in the First World War (London: Allen & Unwin, 1986). The high command of the RFC and RAF, and the political context of the air war, is complex, to say the least. Malcolm Cooper explains the various changes that took place at this level and details the development of the air war from this perspective. Cooper provides important context for understanding the execution of the air war, importantly contributing to the historiographical movement away from the view of First World War air power being exclusively a tactical concern.
Dennis Haslop, Early Naval Air Power: British and German Approaches (New York: Routledge, 2018). Dennis Haslop presents a comparative study of the Royal Naval Air Service and the Imperial German Naval Air Service, highlighting many striking similarities in the experiences of the two. This includes discussions of inter-service rivalry experienced by both the British and German air services and movements towards unification to create a single air service in each military. In other instances, discussions about the creation of the RAF from a naval perspective tend to present it as a hostile takeover of the RNAS rather than the amalgamation and unification of the two air services. Haslop avoids this, instead he presents a measured and factual account of this important part of Britain’s air power history. (N.B. You can read Ashleigh’s review of Haslop’s book here)
Richard Overy, RAF: The Birth of the World’s First Air Force (New York: Norton & Company, 2018). Richard Overy’s RAF provides an overview of Britain’s air war leading up to 1918, the events that led to the creation of the RAF, the process of achieving this, and the post-war struggle to keep it as a separate service. Although Overy does not engage with all the complexities of the air war in this relatively short book, he presents an excellent overview in the form of a very readable narrative.
Arthur Henry ‘Harry’ Cobby, High Adventure (Melbourne: Robertson & Mullens, 1943). In the years following the First World War, many pilots wrote memoirs detailing their war experience. Among those to do so was Australian pilot Arthur Henry – or Harry – Cobby. Cobby was the leading fighter ace of the AFC, boasting 29 victories during his time with No. 4 Squadron. In High Adventure, he presents a captivating account of his war in the air that I would recommend to anyone interested in how the AFC’s pilots fought the air war on a day-to-day basis.
Charles Rumney Samson, Fights and Flights: A Memoir of the Royal Naval Air Service in World War I (Nashville: The Battery Press, 1990). Continuing with the theme of memoirs, Air Commodore Charles Rumney Samson’s Fights and Flights details his experiences in positions of command in the RNAS. Among these was his involvement in the Gallipoli campaign, in which he led No. 3 Squadron RNAS which was responsible for reconnaissance over the Gallipoli peninsula and Dardanelles straits. Samson’s squadron operated over Gallipoli in the months leading up to the landing of ground forces, remained in support of the land campaign, and supported the eventual evacuation. Although only a portion of the book, this is an important account of the Gallipoli campaign from the air and captures the early contribution of the RNAS in the First World War.
Frederick Sykes, Aviation in Peace and War (London: E. Arnold & Co., 1922). Aviation in Peace and War details Frederick Sykes’ thoughts on the development and use of air power before, during, and after the First World War. Sykes discusses his pre-war thoughts on the potential use of aviation, the Military and Naval Wings of the RFC, technology and tactics, the offensive policy, and how he saw air power progressing after the war. Sykes is somewhat of a controversial character in the wartime RFC, particularly due to his strained relationship with David Henderson and Hugh Trenchard, and this book provides a valuable insight into his involvement in early British air power.
Peter Dye, The Bridge to Airpower: Logistic Support for Royal Flying Corps Operations on the Western Front, 1914-18 (Annapolis: Naval Institute Press, 2015). Peter Dye’s The Bridge to Airpower considers the evolution of First World War air power through a study of logistics on the Western Front. This thoroughly researched account allows for a greater understanding of the difficulties encountered in waging the air war, specifically due to problems sourcing airframes and aero-engines, both in sufficient amounts and of a high quality. Dye also discusses the changing logistic requirements in line with the changing nature of the air war and presents an impressive collection of statistics to show the evolution of British air power during the war.
Ashleigh Brown is the Social Media Editor at From Balloons to Drones and a PhD candidate at the University of New South Wales, Canberra. Her thesis focuses on aviation command in the British air arms during the First World War. It considers developments across the tactical, operational, and strategic levels of command, extending the learning curve theory to the air war. Ashleigh is a researcher for the Official History of Australian Operations in Iraq & Afghanistan and Australian Peacekeeping Operations in East Timor, where her focus is Australia’s commitment to Afghanistan between 2005 and 2010. Her research interests include the First World War, recent conflicts, air power, and military command. Ashleigh can be found on Twitter at: @ash__brown.
Header image: A group of pilots of No. 32 Squadron RFC at Beauval in 1916. Behind them is an Airco DH.2 biplane. (Source: Wikimedia)
Editorial Note: The 4th of July 2018 represented that 100th Anniversary of the Battle of Le Hamel. While Hamel was important, its place as a model on which subsequent operations were based has been overplayed. Furthermore, notable popular Australian historians have also distorted the significance of the battle. Nevertheless, as Dr Michael Molkentin highlights in this article, Hamel was valuable in highlighting the evolution of, and the diverse roles played by, air power in support of land battles during the First World War.
In the historiography of the First World War, the Battle of Hamel (4 July 1918) has frequently been cited as an example of significant tactical innovation and a ‘model’ on which subsequent British offensive operations were planned. While neither interpretation bears up to scrutiny when the battle is viewed within the broader context of British Army operations on the Western Front, relative to its size the Australian Corps’ capture of Hamel integrated air power to a hitherto unprecedented extent and, in hindsight, provides a revealing case study of the varied, distinct and specialist air power roles that had evolved during the conflict.
The Australian Corps’ headquarters, commanded by the recently appointed Lieutenant-General Sir John Monash, planned the capture of the village of Hamel (located south of the Somme) as a line-straightening operation. Besides the troops of his own corps’ 4th Division, Monash had ten infantry companies from the US 33rd Division, 60 tanks from the British 5th Tank Brigade (including the new Mark V tank) and 639 artillery pieces. Monash planned to launch a surprise assault behind a creeping barrage and tank screen (much like British Third Army had done at Cambrai the previous November); he anticipated that his infantry could secure their objectives – two kilometres deep on a seven-kilometre wide front – within an hour and a half.
A unique photo of a disabled British RE8 aircraft diving towards earth during the 4th Australian Infantry Brigade attack at Vaire Wood in the Battle of Hamel. It was subsequently discovered that the machine had been hit by a presumably faulty shell. (Source: Australian War Memorial)
Monash’s staff also worked with the Royal Air Force’s (RAF) V Brigade to organise substantial and multi-layered air support for the operation. The Australian Corps’ corps squadron, No. 3 Squadron Australian Flying Corps (AFC), would conduct the ‘majority of the tactical work’ during the battle. Its airmen would maintain a continuous presence over and directly beyond the battlefield to follow the progress of the Australian infantry (contact patrols), watch for enemy counter-attacks (counter-attack patrols), identify and direct artillery fire onto active German batteries (artillery patrols) and to photograph the new front line once it had been secured. New maps would then be produced and issued to troops in the front line within a matter of hours.[1] Assisting No. 3 Squadron with providing tactical air support, the RAF’s No. 8 Squadron would co-operate with the tanks while No. 9 Squadron parachuted ammunition to troops at their objectives. The night-bombers of No. 101 Squadron flew above the staging area on the night before the battle to mask the noise of the tanks as they moved up to their starting line.
The squadrons of 22nd (Army) Wing were also assigned to support the land battle: three of its four fighter squadrons would fly ground-attack sorties while its Bristol Fighter unit watched roads, railways and debussing points as far east as Proyart (10 kilometres east of Hamel). The army wing’s two bomber squadrons would meanwhile raid known German bivouacs. This aspect of the air plan reflected the RAF’s preference for interdiction over ‘trench strafing’ – the belief being that it was better to harass German troops and artillery behind rather than on the battlefield itself.[2] GHQ allocated three additional fighter squadrons from, IX Brigade, the RAF’s strategic reserve, to provide air superiority and the neighbouring Third Army’s fighters extended their offensive patrols south to cover the rest of Fourth Army’s front.[3]
Probably no other division-sized operation of the war enjoyed the combined support of aircraft from three wings, that is, 13 squadrons, or 230-odd aircraft. As well as the multi-faceted and highly integrated function that air power had assumed by this stage, the air plan, devised by the Australian Corps’ BGGS in collaboration with V Brigade illustrates the British Army’s growing reliance on machinery and firepower to reduce casualties and compensate for dwindling manpower.[4]
As the plan dispensed with a preliminary bombardment, No. 3 Squadron’s artillery spotting began at zero hour. For the first few hours, airmen reported batteries neutralised by the barrage so that artillery commanders could switch their guns onto active targets. The plan also allocated five heavy batteries to answer zone calls, airmen being briefed on where the Germans might move batteries once the battle started.[5] No. 3 Squadron issued 80 zone calls and co-operated in the neutralisation of at least 17 batteries (‘in many cases’ airmen did not see the artillery’s response to zone calls).[6] Although not entirely preventing it, the Australian Corps counter-battery arrangements suppressed the German artillery’s response adequately during the advance and consolidation.[7]
Counter-attack patrols flew beyond the German lines to ‘an unheard of distance’ with instructions to transmit zone calls on concentrations of German troops and engage them with bombs and machine guns.[8] One crew reported a concentration of enemy infantry just before 0700 but otherwise, seeing no enemy counter-attacks the airmen, as Lieutenant Arthur Barrett put it, ‘bombed and machine gunned everything we saw.’ Crossing the line just after zero hour he and his pilot halted a train, silenced several machine gun positions and strafed a pair of limbered guns, overturning one. Descending below 300 feet, Barrett’s eyes ran from gas in the barrage.[9] 3rd Squadron’s airmen dropped 138 bombs and fired 9,500 rounds on 4 July 1918.[10] Combined with the record 54,000 rounds and 850 bombs expended by 22nd Wing’s fighter pilots, this had a considerable impact on such a narrow battlefront.[11] ‘Several’ prisoners attested to the ‘moral effect’ of air attacks and noted how:
[t]hey prevent men getting machine guns into action almost as effectively as a barrage […] it was almost impossible to look over the top without getting machine gunned from the air.[12]
Corroborating this is German Second Army orders that noted ‘heavy casualties caused by machine gun fire from low-flying enemy machines’ at Hamel and issued instructions for dealing with British aircraft.[13]
Although Australian infantry had been signalling to aircraft since operations at Poziéres in 1916, contact patrols represented a new role for 3rd Squadron at Hamel. Despite difficulties experienced during the 1916-17 campaigns, the general staff recognised that aircraft provided the shortest possible passage of information from the battlefield to corps (and, atypically at Hamel, divisional) headquarters.[14] Dropped by airmen returning from the line, contact patrol reports reached headquarters staff in 24 minutes on average – up to half the time taken by a wireless message and a third of that usually taken by carrier pigeon.[15] Experience indicated that staff needed to synchronise contact patrols with the infantry’s timetable carefully. At Hamel, No. 3 Squadron had instructions to call for flares on the objective at 90 minutes after zero.[16] No. 8 Squadron followed the tanks across the battlefield and ‘in one or two cases were able to give information as to those which had been put out of action.’[17] The infantry’s clockwork progress and minimal resistance at the objective allowed the infantry and tanks to respond ‘well’ when contact patrol pilots sounded their klaxon horns; the airmen delivered ‘exceedingly accurate’ reports.[18] It remained to be seen, however, how the system would cope during running battles and exploitation operations when it would be arguably more crucial for staff to keep track of their troops.
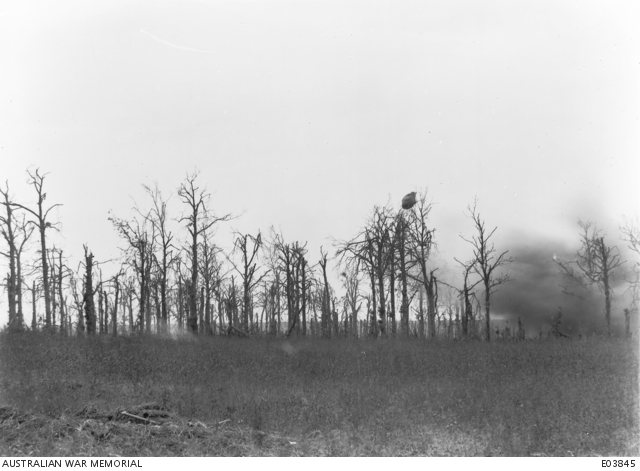
A parachute, used as an ammunition carrier, caught in the trees at Vaire Wood, during the Battle of Hamel on 4 July 1918, when the supply of ammunition to the infantry by means of parachutes was a feature of aircraft cooperation. The picture was taken the day following, during shelling by the enemy of newly won Australian positions. (Source: Australian War Memorial)
For the first time, at Hamel, the RAF organised battlefield resupply using equipment designed and built at No. 3 Squadron’s aerodrome under the direction of ‘B’ Flight’s commander, Captain Lawrence Wackett. The idea apparently came from the Luftstreitkräfte’s (German Air Service) attempts at dropping ammunition to troops on the battlefield during the spring offensives.[19] At Hamel a detachment from No. 9 Squadron carried out the work, dropping 111,600 rounds to Australian troops at their objectives and at dropping stations close behind the line.[20] Endorsing Wackett’s claim for a £1,000 inventor’s fee from the British government (he received £350), Monash declared the scheme ‘an unqualified success’, noting how it permitted the rapid resupply of troops in ‘isolated and exposed positions’ and saved casualties among carrying parties.[21] His subordinates, though more prosaic, also indicated the trial’s success. 4th Australian Infantry Brigade’s CO described it as working ‘satisfactorily’ while 6th Brigade’s commander noted how the scheme ‘worked very well,’ delivering ammunition within 10 yards of one machine gun position.[22] Though faster, aircraft lacked the carrying capacity of other transportation available to the Australian Corps: a single tank could deliver four times as much ammunition as each of No. 9 Squadron’s aircraft, plus 300 grenades, 450 litres of water and a vast quantity of food and other trench stores.[23] Employed in all subsequent British offensives (the RAF delivered 30-60,000 rounds each day during the Amiens offensive), ammunition drops by corps squadrons thus remained an ‘emergency’ adjunct to other forms of battlefield logistics.[24]
The RAF’s tactical support was enabled, to a substantial extent, by the air superiority that British airmen exercised over the battlefield. Throughout the day, the fighter squadrons of 22nd (Army) Wing and three additional fighter squadrons attached from IX Brigade, ranged east of the battlefield to intercept any German aircraft that attempted to interfere. It was RAF policy to employ air superiority patrols offensively, east of the lines, rather than as a protective screen or close escorts. The airmen of the Luftstreitkräfte made no sorties over the Hamel battlefield until 9.30am – some five hours after the Australian infantry had secured their objective line. German fighters after that became ‘fairly active’ over the area, and there were ten air-to-air combats. In the largest of these, the SE5as of No. 24 Squadron engaged a mixed formation of 20 Fokker DVIIs, Pfalz scouts and Albatros DVs over Cerisy, six kilometres east of Hamel. The British pilots claimed three enemy aircraft and lost none themselves.[25] It is noteworthy that No. 24 Squadron was one of the 22nd (Army) Wing fighter units allocated to bomb and strafe targets on the ground behind German lines – its involvement in this dogfight illustrates the integration of air superiority and interdiction roles that British airmen had begun to undertake at Third Ypres the previous year.
Altogether, of the hundreds of sorties flown by the RAF in support of the Hamel operation, only three resulted in the loss of an aircraft to air combat– and only one of these involved one of the aircraft involved in direct tactical support over the battlefield. All other British losses resulted from ground fire, to which the pilots of low-altitude contact patrols and ammunition drops, were considered vulnerable.[26] The RAF’s efforts to maintain air superiority, therefore, appear to have been overwhelmingly successful – although the woeful deficiencies in material (especially fuel) that the Luftstreitkräfte faced in the summer of 1918 need to be recognised when evaluating the success of the British air plan.
The remains of RE8 C4580, which was shot down at Hamel Wood, by the enemy, after it had succeeded in dropping ammunition to the forward troops by means of parachutes. This aircraft was flown by No. 9 Squadron RAF during the Battle of Hamel and used for ammunition drops to the forward troops. (Source: Australian War Memorial)
The Battle of Hamel, therefore, indicates the extent and sophistication to which the application of British air power in support of surface operations had evolved during the First World War. The efforts of British airmen to support of Monash’s troops were not only extensive but organised carefully, through a variety of distinct air power roles, to provide a range of tactical and operational-level services that, considering the aircrafts’ technical limitations, functioned effectively. Indeed, the operation represented the high-water mark of efficacy in air-ground cooperation in the British Expeditionary Force during the First World War. As a limited, set-piece battle, Hamel drew on structures, procedures and technologies that had evolved during four years of trench warfare. Subsequent British operations during the ‘Hundred Days’, in which exploitation and pursuit replaced carefully planned set pieces, would test this system of integrating air power with surface forces and in some respects undermine the efficacy of British close air support. The war’s final battles would, in some respects, force airmen to begin their ‘learning curve’ all over again.[27]
Dr Michael Molkentin is a head teacher at Shellharbour Anglican College and an adjunct lecturer at the University of New South Wales Canberra. He has a PhD in History from the University of New South Wales and is the author of three books, including Australia and the War in the Air (OUP, 2014). His next book, a biographical history of Sir Ross Macpherson Smith and the 1919 England to Australia air race will be published in 2019.
Header Image: An R.E.8 aircraft, serial number A3662, ‘J’, presented to the Australian Flying Corps by Mr H. Teesdale Smith of Adelaide, South Australia. This was the type of aircraft used by No. 3 Squadron AFC at the Battle of Hamel. (Source: Australian War Memorial)
If you would like to contribute to From Balloons to Drones, then visit our submissions page here to find out how.
[1] Australian War Memorial (AWM), Canberra, AWM4 8/6/19 Part 1, 3rd Squadron War Diary, 4 July 1918.
[2] For a clear expression of this idea, see the Royal Flying Corps’ plans for defence in the German spring offensives: H.A. Jones, The War in the Air: Being the Story of the Part played in the Great War by the Royal Air Force, Vol. IV, (Oxford: The Clarendon Press, 1934), p. 445.
[3] The National Archives (TNA), London, AIR1/677/21/13/1887, Air Historical Branch, The Western Front Air Operations, May-November 1918, pp. 54-5.
[4] TNA, AIR1/1592/204/83/17, Brigadier-General Thomas Blamey, BGGS Australian Corps to GOC 4th Australian Division and GOC V Brigade RAF, 29 June 1918; Gary Sheffield, Forgotten Victory: The First World War – Myths and Realities (London: Review, 2002), p. 236.
[5] AWM, AWM26 364/12, Counter-battery Australian Corps HA Operation Order No. 7, 1 July 1918.
[6] AWM, AWM4 8/6/19 Part 1, 3rd Squadron war diary, 4 July 1918; TNA, AIR1/1009/204/5/1289, RAF Headquarters, Notes on corps squadrons work on the First and Third Army fronts during recent operations, 14 September 1918.
[7] AWM, AWM4 1/48/28 Part 1, 4th Division general staff war diary, 4 July 1918. The divisional staff noted that enemy artillery was ‘not very active’ and that retaliation against the Australian barrage was ‘weak’.
[8] AWM, AWM 2DRL/0053, Lieutenant Arthur Barrett to mother, 30 August 1918.
[9] AWM, AWM 2DRL/0053, Barrett to mother, 30 August 1918.
[10] AWM, AWM4 8/6/19 Part 1, 3rd Squadron war diary, 4 July 1918.
[11] TNA, AIR1/1592/204/83/17, CO 22nd Wing RAF, ‘Summary of Operations’, 11 July 1918.
[12] TNA, AIR1/2124/207/74/3, Summary of air intelligence, 18 July 1918; AWM, AWM4 8/14/2, RAF Communiqué No. 15, 17 July 1918.
[13] TNA, AIR1/2124/207/74/3, Summary of air intelligence, 18 August 1918.
[14] General Staff, SS 205 – Notes on Observation from Aeroplanes (France: Army Printing and Stationary Services, February 1918), p. 10; AWM, AWM4 8/6/18, Captain Errol Knox, recording officer, 3rd Squadron to 3rd Squadron flight commanders, 3 July 1918.
[15] Jonathan Boff, ‘Air/land integration in the 100 Days: the case of Third Army’, RAF Air Power Review, 12:3 (2009), p. 82.
[16] AWM, AWM4 8/6/18, Knox to 3rd Squadron flight commanders, 3 July 1918.
[17] TNA, AIR1/677/21/13/1887, Air Historical Branch, Western Front air operations May-November 1918.
[18] AWM, AWM4 8/6/19 Part 1, 3rd Squadron war diary, 4 July 1918.
[19] F.M. Cutlack, Official History of Australia in the War of 1914-1918: Volume VIII – The Australian Flying Corps in the Western and Eastern Theatres of War, 1914-1918 (Sydney, NSW: Angus and Robertson, 1939 [1923], p. 272; EML Gorrell papers, Series M, Item 14, GHQ AEF, Summary of Air Information, No. 29, 19.6.18.
[20] AWM, AWM4 8/6/19 Part 1, 3rd Squadron war diary, 4 July 1918.
[21] AWM, AWM10 43/13, Lieutenant-General John Monash, GOC Australian Corps to The Royal Commission on Awards to Inventors, 13 May 1919.
[22] AWM, AWM4 23/4/34 Part 1, Fourth Australian Infantry Brigade Intelligence Summary, 6am 3.7.1918 to 6am 4.7.1918; AWM4 23/6/35 Part 1, Brigadier-General J. Paton, CO 6th Australian Infantry Brigade, Preliminary Report on Operations of 6th AI Brigade on 4-7-1918.
[23] AWM, AWM4 1/48/29 Part 3, Fourth Australian Division Report on Operations- August 7th to August 10th 1918.
[24] Jones, The War in the Air, Vol. VI (1937), p. 484; TNA, AIR1/1009/204/5/1289, RAF Headquarters, Notes on corps squadrons work on the First and Third Army fronts during recent operations, 14 September 1918; TNA, AIR1/1591/204/83/8, 15th Wing Operation Order No. 112, 17 September 1918.
[25] AWM, AWM4 8/14/2, Royal Air Force Communique No. 14, 10 July 1918.
[26] Trevor Henshaw, The Sky their Battlefield II: Air Fighting and Air Casualties of the Great War, (London: Fetubi Books, 2014), p. 187.
[27] This argument is expanded in Michael Molkentin, Australia and the War in the Air (Melbourne: Oxford University Press, 2014), pp. 196-206.
Editorial Note: In the third instalment of ‘Air War Books,’ Dr Michael Molkentin discusses the ten books that have influenced and shaped his writing as an air power historian. If you are interested in contributing to this series or From Balloons to Drones more generally, find out how here.
After I wrote to Dr Ross Mahoney enthusiastically agreeing with several of his choices (always a bad idea!) and suggesting a few others, he promptly invited me to contribute my own ‘Top 10’. I had been saying I would write something for Balloons to Drones for a while and so now he had me cornered. What follows is a list of titles that have had a significant impact on the way I research and write aviation and air power history. As these titles clearly indicate, my area of interest primarily concerns the pre-Second World War period (military and civil) and the people and ideas, rather than the technology, of aviation.
Denis Winter, The First of the Few: Fighter Pilots of the First World War(London: Allen Lane, 1982). Denis, unfortunately, went on to write a scandalously bad book on Haig that damaged his reputation as a historian. But before that, he produced a couple of genuinely very good ‘face of battle’ type histories of British servicemen in the Great War (the other being Death’s Men). I found The First of the Few in my high school library and later used it as a model for writing my honours thesis on Australian airmen in the Great War. It is a bit dated, relies almost entirely on published accounts and some of Winter’s statistics do not stand up to scrutiny. But it is what got me interested in the subject and stands as the best personal experience study of British airmen in the Great War. I had the pleasure of meeting Denis in Canberra in 2004. He was a kind and gracious man and, when I showed him my work, he encouraged me to keep writing.
Richard P. Hallion, Taking Flight: Inventing the Aerial Age, from Antiquity Through the First World War (New York: Oxford University Press, 2003). I might have included any of Richard’s numerous books on air power (Strike from the Sky, his history of ground attack is a close second) but this has probably been most useful and influential in my work. It is a model of highly readable, yet meticulously researched history. It is international in scope and provides some valuable analysis of the complex ways in which aviation emerged as a practical reality, in various parts of the world, before 1914.
S.F. Wise, The Official History of the Royal Canadian Air Force, Volume 1: Canadian Airmen and the First World War(Toronto: University of Toronto Press, 1980). Wise’s first volume of the Royal Canadian Air Force’s official history is, in my view, the best single volume history of British air power in the Great War. The ubiquity of Canadians in the British flying services (over 20,000 served) means that Wise needed to cover all aspects of air power in the conflict – maritime aviation, strategic bombing and home defence, army cooperation and even some brief surveys of the RFC/RAF in secondary theatres. While some of his conclusions about the conduct of the war on the Western Front have dated, in the main his conclusions stand and are thoroughly grounded in archival sources. My PhD thesis and the book that followed it used Wise’s book as a model to examine Australia’s part in the air war from political, strategic, operational and tactical perspectives.
E.R. Hooton, War over the Trenches: Air Power and the Western Front Campaigns 1916-1918 (Hersham: Midland Publishing, 2010). I have mixed feelings about his book. On the one hand, it makes a significant contribution to our understanding of air power on the Western Front by conducting a multi-force (French, German and British) analysis at the operational level- something nobody had previously attempted. Whereas previous studies of the subject have focused on the tactical level, Hooton uses a mass of statistical data (sorties flown, ordnance expended, losses, serviceability, etc.) to provide a much broader picture of how air power influenced the conflict and how its use evolved between 1916 and 1918. Unfortunately, the book is poorly written and (in the first edition at least) so badly type set that some of the data tables are almost unreadable. It is such an important contribution to the field: I only hope the publisher has the good sense to reissue a revised edition or that an aspiring PhD candidate will take his approach further.
John Buckley, Air Power in the Age of Total War(London: UCL Press, 1999). I am going to go with Ross here and say that, among the many air power surveys out there, this one is the best. It is clear, concise and, essentially for a book like this, gets the balance right between ideas and details. Giving his narrative cohesion is a compelling, convincing and delightfully ironic thesis: that total war first enabled air power but then, following the onset of the nuclear age, limited its functions.
Philip S. Meilinger, The Paths of Heaven: The Evolution of Airpower Theory(Maxwell AFB, AL: Air University Press, 1977). Besides Buckley, the other book I recommend students starting out in the field is Meilinger’s survey of air power thinking. It is a straightforward, textbook approach devoting a chapter to each of the twentieth century’s most influential air power theorists. It is not exactly a page turner but is absolutely essential reading for students of air power and a useful reference work to have within arm’s reach when writing.
Malcolm Cooper, The Birth of Independent Air Power: British Air Policy in the First World War (London: Allen and Unwin, 1986). Malcolm was one of the first scholars to use the Air Ministry’s declassified files after their transfer to the British National Archives (then the PRO) during his PhD candidature during the 1970s. Whereas accounts of British air power’s early days had, until then, been overwhelmingly focused at the tactical level (individual pilots, squadrons, Biggles, etc.), The Birth of Independent Air Power focuses on the topic at the political and policy-making levels. I do not agree with Malcolm’s conclusion that the Army’s use of air power was wasteful and unimaginative (neither does James Pugh in his excellent new book which provides a good update on aspects of Cooper) but much of what he says was vital in adding political context to the operational history of British air power from 1914 to 1918.
Alfred Gollin, The Impact of Air Power on the British People and their Government (Stanford, CA: Stanford University Press, 1989). I would give this to students not even interested in air power as a somewhat rare example of an academic historian writing in a clear, engaging style. Honestly, it reads like a novel but still manages to seamlessly incorporate excellent analysis. Gollin was an enormously talented historian and a shining example to those of us who actually want our work to have a readership beyond the academy and services.
John A. Lynn, Battle: A History of Combat and Culture (Boulder, CO: Westview Press, 2003). Lynn does not really deal with aviation or air power explicitly, but his approach to explaining warfare through the prism of culture is both novel and enlightening. In case study chapters ranging from Ancient Greek warfare to modern Islamic terrorism, Lynn demonstrates convincingly that we cannot properly understand military operations without considering the cultures that conceive and wage them.
Ian Mackersey, Smithy: The Life of Sir Charles Kingsford Smith (London: Little Brown, 1998). This is not only the best of the many biographies of Kingsford Smith; it is the best example of historical biography I have come across. Through impressively dogged detective work, Mackersey managed to track down a number of people who had known Kingsford Smith before his death six decades earlier. From them, he got oral history and private papers that shed light on hitherto unknown or mythologised aspects of his subject’s life. Ian wrote a page turner too: it is engaging, absorbing history. Ian, who sadly died a couple of years ago, was also a gentleman. When I was writing my book on the 1928 trans-Pacific flight, he generously shared manuscript material he had gathered from private collections in the US when researching his book.
Dr Michael Molkentin is an adjunct lecturer at the University of New South Wales and a teacher at Shellharbour Anglican College. He has a first-class Honours degree from the University of Wollongong and a PhD in History from the University of New South Wales. In 2014, the Australian War Memorial awarded Michael’s doctoral research the Bryan Gandevia Prize for Australian Military History. He specialises in the history of armed conflict with an emphasis on warfare in the British world and the development of air power. Michael has written three books, the most recent being Australia and the War in the Air(OUP, 2014).